Tutorial - Generating a sample ASP.NET WebForms
application with CodeTrigger
To work with these sample projects you will need CodeTrigger installed, Visual Studio
2013-2017 (Or Sparx Systems Enterprise Architect), and a test database with some data.
Follow these steps below to generate your complete WebForms sample application without writing a single line of code.
This guide has been updated for version 5.1.0.0 (released June 10th 2017)
|
|
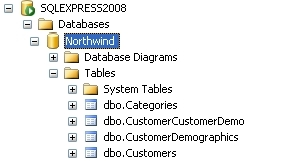
Microsoft Northwind Sample db
|
Step 1 - Ensure you have a relevant test database
The CodeTrigger sample applications are designed to work with your existing database
schema to ensure that the samples are as relevant as possible. Ensure that you have
a TEST SQL Server/Oracle/MYSQL database handy. CodeTrigger and its associated supplier
companies do not accept any liability for data loss whilst using the CodeTrigger
product. It is important that you use a test database until you are familiar with
the functionality of the generated code.
|
|
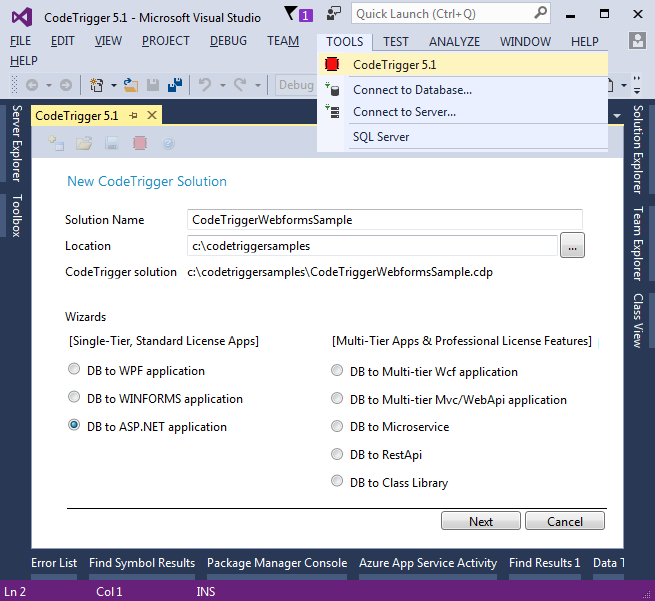
Step 2 - Create a CodeTrigger project settings file
From the Visual Studio 'Tools' menu (or from Enterprise Architect's 'Extensions' menu)...
Open CodeTrigger
Select 'New' (or '+' icon)
Solution Name = CodeTriggerWebformsSample
Location = C:\CodeTriggerSamples
As your Codetrigger Solution settings.
Select the 'DB to ASP.NET application' wizard
Click Next
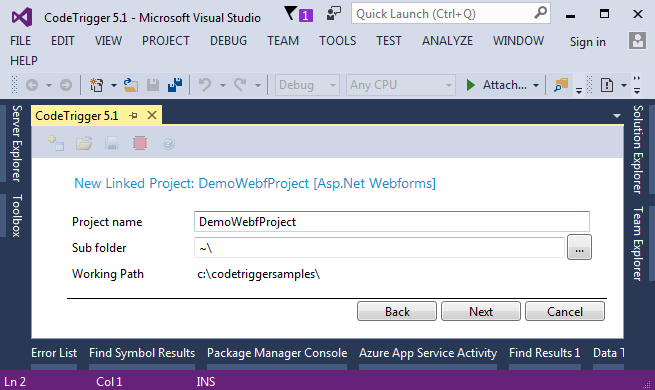
Name your new CodeTrigger project 'DemoWebfProject'
Click 'Next' and enter your data source connection details.
Finally, click 'Create'.
Step 3 - Schema Objects
The wizard opens the CodeTrigger project to the Schema objects tab. Here you see a list of the tables and views that have been found. Check the box(es) next to the tables you are interested in generating code for.
|
|
|
Step 4 - Select Business Objects.
Click the Business objects tab. There will be a slight delay while CodeTrigger builds
up a Business Domain Model based on your selections so far. After which you will
be presented with a list of business objects. There might be more objects than the
tables/views you selected in Step 5. This is because CodeTrigger has detected a
dependency relationship in the database schema and suggested the additional objects.
Select the business objects you actually want in your sample. If an object you select
has an enabled 'expand' button, you can expand it and include collection management
for the collection objects in the generated code.
|
|
|
|
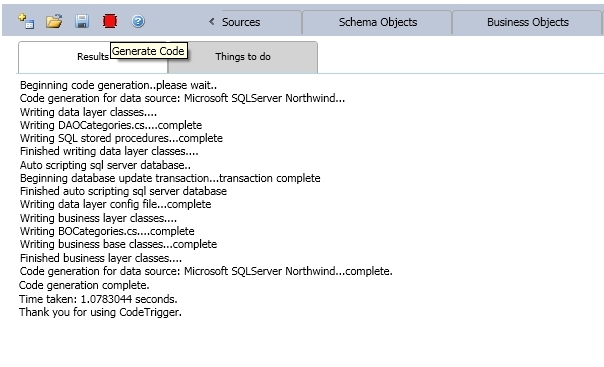
Step 5 - Shoot
Click the 'Generate Code' button. CodeTrigger analyses the choices you have made
and generates all the necessary files and classes and scripts to support your application.
Now open the generated Visual Studio ASP.Net web application project/solution at the location you specified in step 2
Note the output in the CodeTriggers 'Results' tab during code generation, and any comments presented in a 'Things to do' tab as you might be required to undertake some additional steps.
Generated Business Object files
In your Visual Studio project, in the 'BusinessObjects' folder you created earlier,
you will find all the classes supporting the business domain model. Ensure to 'include'
the code files in your project, if they are not automatically included (Right click
the files and select 'Include In Project')
|
Generated Data Object files
In the 'DataObjects' folder you created earlier, you will find all the classes supporting
the data model, including the SQL script file. Ensure to 'include' the code files in your project, if they are not automatically
included (Right click the files and select 'Include In Project').
As the wizard does not default to 'Automatic database scripting', if you are generating code from Oracle or MYSQL you will need to run the generated script file against your project database to create all the required SQL PROCEDURES/PACKAGES in your database.
If you are generating code against a Microsoft SQL Server db, then the wizard defaults to generating Inline/Embedded SQL, so there will be no need to run any script.
|
|
|
|
Step 6 - Configure & RUN!
Ensure that the folder called 'ClassicSample' and all the files in it are included
in the Webforms project
Add the following lines to your Webforms MainWindow constructor to popup your generated
sample forms:
Response.Redirect("ClassicSample/MainFrame.aspx");
Build your Webforms application!
Right click your 'DemoWebfProject' project, select 'Set as startup project'.
Hit 'F5' and run your generated Webforms application!
|
|
Thats it, your CodeTrigger Generated WebForms Application, without writing a single
line of Code!!
|